Sekiro Shadows Die Twice: Corrupted Monk Boss Fight
Corrupted Monk is a story-related boss guarding the Shelter Stone in the last location of Ashina Depths region. At first glance, this fight may seem difficult because the enemy is a spirit, has a weapon with a long reach and is tall. Read this chapter and you will see that this boss isn't as challenging.
Where can I find Corrupted Monk?
Location: Ashina Depths [Sculptor's Idol: Mlyn wodny]
Nagrody: Memory: True Monk (additional strength point), Mibu Breathing Technique
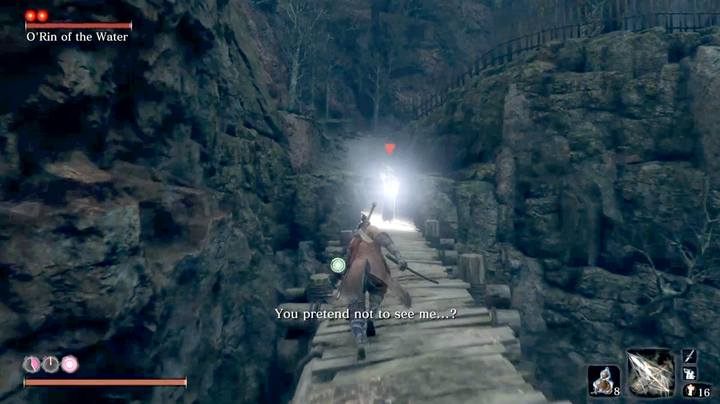
To reach the last boss of Ashina Depths, you have to go through Mibu Village and activate Water Mill Sculptor's Idol. O'Rin of the Water is nearby, but this is an optional mini-boss which means that you can skip her. Cross the bridge and stick to the path - follow the passage on the left side of the building surrounded with the undead. You will reach the boss arena.
How to defeat Corrupted Monk?
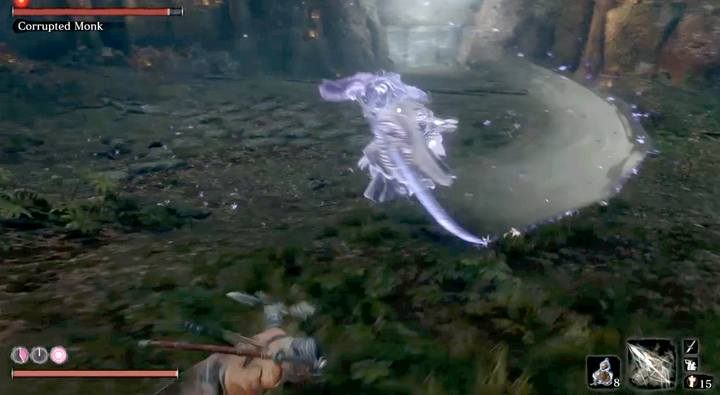
The boss always starts the fight in the same way. Run towards her, deal a few fast strikes and run away - the boss will start swinging her weapon (5 times); after that, she will perform three basic and slower attacks. This is the only chance you get to use a more powerful attack (e.g. Mortal Draw) or a prosthetic tool capable of dealing massive damage. After that, you should rely on Shinobi Firecracker.
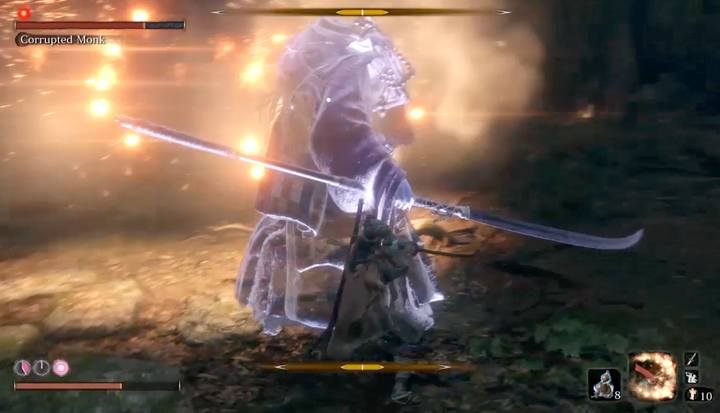
Throw Shinobi Firecracker and then immediately move behind the boss's back. Attack her with basic attacks. You need to attack the Monk's back - by doing this you are sure that at least 2-3 strikes will hit the target. If you attack her from the front, she will deflect your basic attacks.
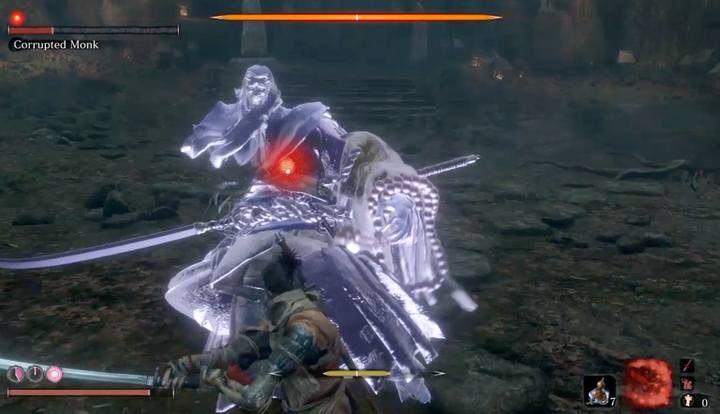
Deplete the majority of the boss's health points to proceed to the next stage. You have to focus on deflecting her attacks. The Monk's posture regeneration slows down. She will also perform one attack after another - you should be able to fill up her posture bar fast. After that, you need to deal a Deathblow.
The diving skill is the most important reward. You need this ability to progress the story and to do optional exploration, e.g. to find treasures hidden under the water (mainly Treasure Carp Scales).

- Sekiro Guide and Walkthrough
- Sekiro Shadows Die Twice: Game guide
- Sekiro Shadows Die Twice: Bosses
- Sekiro Shadows Die Twice: General Naomori Kawarada Boss Fight
- Sekiro Shadows Die Twice: Chained Ogre Boss Fight
- Sekiro Shadows Die Twice: General Tenzen Yamauchi Boss Fight
- Sekiro Shadows Die Twice: Great Serpent Boss Fight
- Sekiro Shadows Die Twice: Great Serpent - the second and third encounter
- Sekiro Shadows Die Twice: Juzou the Drunkard Boss Fight
- Sekiro Shadows Die Twice: Lady Butterfly Boss Fight
- Sekiro Shadows Die Twice: Unnamed masked purple enemy Boss Fight
- Sekiro Shadows Die Twice: Gyoubu Oniwa Boss Fight
- Sekiro Shadows Die Twice: The Blazing Bull Boss Fight
- Sekiro Shadows Die Twice: Shinobi Hunter Enshin of Misen Boss Fight
- Sekiro Shadows Die Twice: Lone Shadow Longswordsman Boss Fight
- Sekiro Shadows Die Twice: Seven Ashina Spears Boss Fight
- Sekiro Shadows Die Twice: Armored Warrior Boss Fight
- Sekiro Shadows Die Twice: Genichiro Ashina Boss Fight
- Sekiro Shadows Die Twice: Guardian Ape in Sunken Valley Boss Fight
- Sekiro Shadows Die Twice: Headless Guardian Ape in Ashina Depths Boss Fight
- Sekiro Shadows Die Twice: Tokujiro the Glutton Boss Fight
- Sekiro Shadows Die Twice: Mist Noble Boss Fight
- Sekiro Shadows Die Twice: O'Rin of the Water Boss Fight
- Sekiro Shadows Die Twice: Chained Ogre from Ashina Castle Boss Fight
- Sekiro Shadows Die Twice: Lonely Shadow Vilehand Boss Fight
- Sekiro Shadows Die Twice: Long-arm Centipede Sen'un Boss Fight
- Sekiro Shadows Die Twice: Snake Eyes Shirafuji Boss Fight
- Sekiro Shadows Die Twice: Long-arm Centipede Giraffe Boss Fight
- Sekiro Shadows Die Twice: Shinobi Eyes Shirahagi Boss Fight
- Sekiro Shadows Die Twice: Corrupted Monk Boss Fight
- Sekiro Shadows Die Twice: General Kuranosuke Matsumoto Boss Fight
- Sekiro Shadows Die Twice: Shichimen Warrior Boss Fight
- Sekiro Shadows Die Twice: Ashina Elite - Jinsuke Saze Boss Fight
- Sekiro Shadows Die Twice: Headless (underwater) #1 Boss Fight
- Sekiro Shadows Die Twice: Lone Shadow Masanaga Boss Fight
- Sekiro Shadows Die Twice: Emma, the Gentle Blade Boss Fight
- Sekiro Shadows Die Twice: Isshin Ashina Boss Fight
- Sekiro Shadows Die Twice: Great Shinobi Owl Boss Fight
- Sekiro Shadows Die Twice: True Corrupted Monk Boss Fight
- Sekiro Shadows Die Twice: Sakura Bull of the Palace Boss Fight
- Sekiro Shadows Die Twice: Demon of Hatred Boss Fight
- Sekiro Shadows Die Twice: Ashina Elite - Ujinari Mizuo Boss Fight
- Sekiro Shadows Die Twice: Shigekichi of the Red Guard Boss Fight
- Sekiro Shadows Die Twice: Seven Ashina Spears - Shume Masaji Oniwa Boss Fight
- Sekiro Shadows Die Twice: Genichiro & Isshin, the Sword Saint Boss Fight
- Sekiro Shadows Die Twice: Okami Leader Shizu Boss Fight
- Sekiro Shadows Die Twice: Headless #2 Boss Fight
- Sekiro Shadows Die Twice: Shichimen Warrior #1 Boss Fight
- Sekiro Shadows Die Twice: Shichimen Warrior #2 Boss Fight
- Sekiro Shadows Die Twice: Headless (underwater) #3 Boss Fight
- Sekiro Shadows Die Twice: Headless #4 Boss Fight
- Sekiro Shadows Die Twice: Headless #5 Boss Fight
- Sekiro Shadows Die Twice: Divine Dragon - Main Boss
- Sekiro Shadows Die Twice: Bosses
- Sekiro Shadows Die Twice: Game guide
You are not permitted to copy any image, text or info from this page. This site is not associated with and/or endorsed by the developers and the publishers. All logos and images are copyrighted by their respective owners.
Copyright © 2000 - 2026 Webedia Polska SA for gamepressure.com, unofficial game guides, walkthroughs, secrets, game tips, maps & strategies for top games.