Sekiro Shadows Die Twice: True Corrupted Monk Boss Fight
True Corrupted Monk is one of the bosses found in Fountainhead Palace in Sekiro: Shadows Die Twice. On this page, you can find a great strategy that will help you survive 2/3 of the fight. Also, you will learn how to win the third part of the fight with the Monk.
- How to unlock the fight with True Corrupted Monk?
- Preforming the first and the second Deathblow
- Performing the third Deathblow
How to unlock the fight with True Corrupted Monk?
Location: Fountainhead Palace
Rewards: Memory: True Monk, Dragon's Tally Board - this artifact allows you to purchase more items from the merchants.
True Corrupted Monk is the first boss encountered in Fountainhead Palace. Check How to enter the Fountainhead Palace? page to learn how to unlock this location. To access that place, you have to stay loyal to Kuro during the game's finale and defeat Great Shinobi Owl. After that, you have to speak with Kuro and Emma.
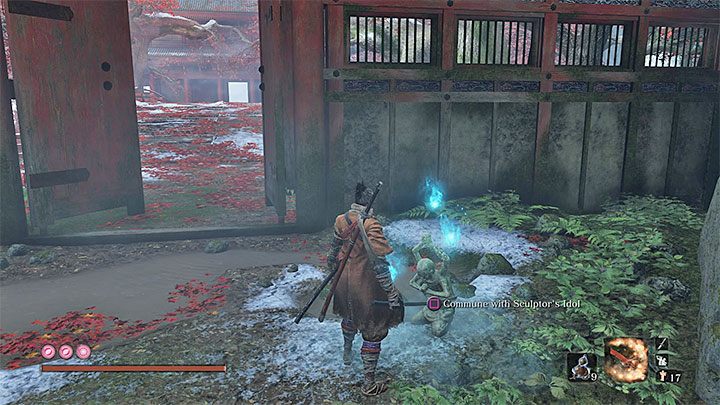
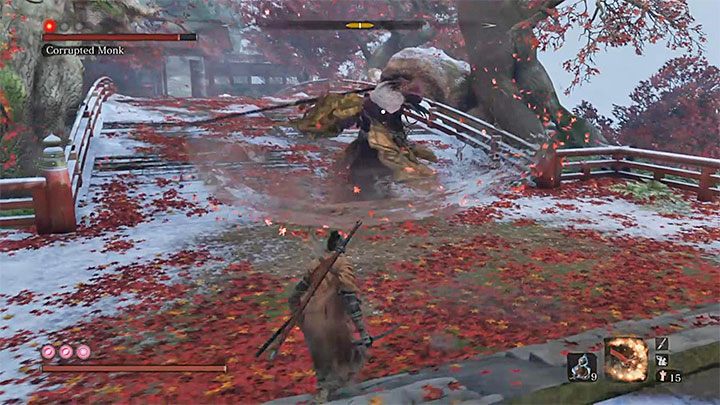
The boss guards a large bridge. A Sculptor's Idol is located in front of it. We don't recommend going straight to the boss. It is better to start the fight with a stealth attack - you will be able to deal one or (preferably) two Deathblows. This will shorten the fight significantly.
Preforming the first and the second Deathblow
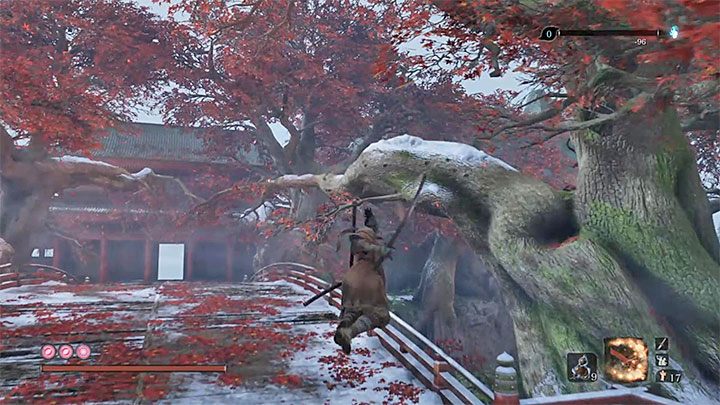
Start using the grappling hook right after you move closer to the bridge. Keep moving from one hook point to another (the ones located on the trees on the right).

The last thing you have to do is to move to the highest hook point located on the left.

Turn around to face the boss - she is standing below you. Wait for the True Corrupted Monk to make a single stomp. Jump towards her. The red dot should appear while you are still in the air - this is your chance to perform the first Deathblow.
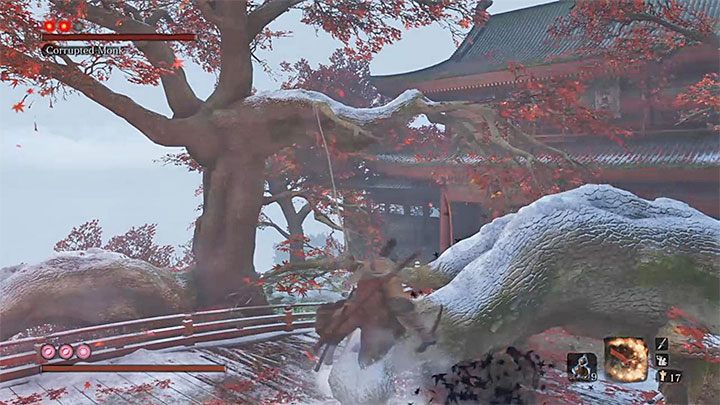
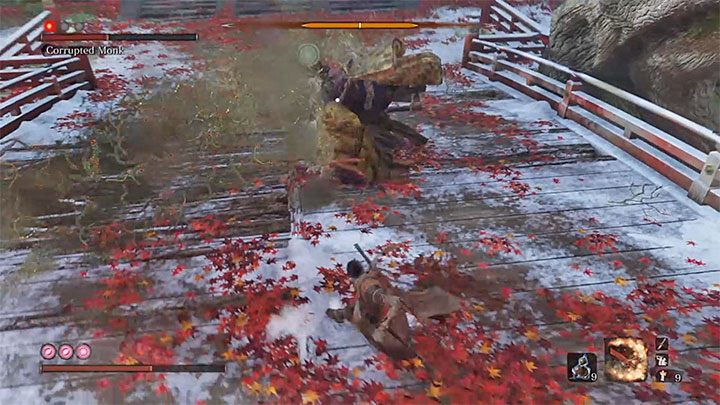
After that, quickly use the grappling hook on the nearest hook point. Go back to the highest branch, the same one you have jumped down.
Face the partially invisible Monk. Lock the camera on her and jump towards the boss. Perform the second Deathblow.
It is easy to make a mistake here and let the boss see you or to jump down at the wrong time (too early or too late). If you failed to perform any of the two Deathblows, jump off the bridge. Keep repeating this strategy until you manage to deplete 2/3 of the Monk's health.
Performing the third Deathblow
The third, and last, phase of the fight with the True Corrupted Monk is a typical duel. We recommend defeating the boss by depleting her health bar.
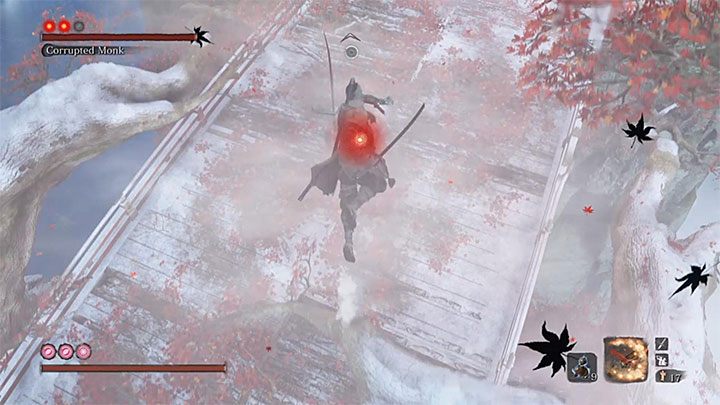
True Corrupted Monk has similar moves to her spirit version encountered in Ashina Depths. She fights using a large blade with great reach. Her basic attacks are usually a series of attacks (up to five slashes) that can be combined with sudden dashes towards Wolf. It is possible to deflect these attacks but you should be careful because the True Corrupted Monk also uses unblockable attacks (marked with the red symbol).
The True Corrupted Monk can also spit poison sporadically. This attack is extremely dangerous because it fills up a negative status bar. When it gets full, you will die automatically. Move back if you notice that the boss is preparing for this attack or when you are about to get hit by it. Use the grappling hook to avoid her attacks.
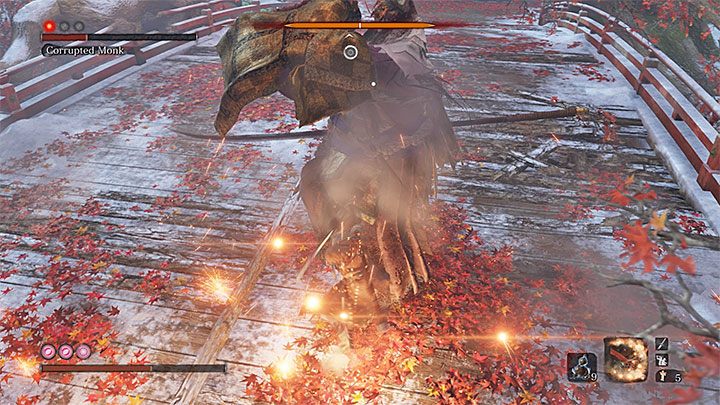
Luckily, there is a simple strategy that will allow you to defeat the True Corrupted Monk. Use Shinobi Firecracker after the Monk's every attack and when she is preparing for another strike.
The Shinobi Firecracker's undeniable advantage is that it forces the boss to stop attacking for a brief moment. This gives you an opportunity to deal 4-5 regular attacks. If you want to shorten the fight, eat Ako's Sugar to give Wolf a strength boost.
Your Spirit Emblem supplies should last for the entire fight. If you run out of them, attack the Monk after, e.g. she performs a series of five spin attacks. Run a lot on the bridge in between the attacks but watch out, you don't want to fall off the bridge.
- Sekiro Guide and Walkthrough
- Sekiro Shadows Die Twice: Game guide
- Sekiro Shadows Die Twice: Bosses
- Sekiro Shadows Die Twice: General Naomori Kawarada Boss Fight
- Sekiro Shadows Die Twice: Chained Ogre Boss Fight
- Sekiro Shadows Die Twice: General Tenzen Yamauchi Boss Fight
- Sekiro Shadows Die Twice: Great Serpent Boss Fight
- Sekiro Shadows Die Twice: Great Serpent - the second and third encounter
- Sekiro Shadows Die Twice: Juzou the Drunkard Boss Fight
- Sekiro Shadows Die Twice: Lady Butterfly Boss Fight
- Sekiro Shadows Die Twice: Unnamed masked purple enemy Boss Fight
- Sekiro Shadows Die Twice: Gyoubu Oniwa Boss Fight
- Sekiro Shadows Die Twice: The Blazing Bull Boss Fight
- Sekiro Shadows Die Twice: Shinobi Hunter Enshin of Misen Boss Fight
- Sekiro Shadows Die Twice: Lone Shadow Longswordsman Boss Fight
- Sekiro Shadows Die Twice: Seven Ashina Spears Boss Fight
- Sekiro Shadows Die Twice: Armored Warrior Boss Fight
- Sekiro Shadows Die Twice: Genichiro Ashina Boss Fight
- Sekiro Shadows Die Twice: Guardian Ape in Sunken Valley Boss Fight
- Sekiro Shadows Die Twice: Headless Guardian Ape in Ashina Depths Boss Fight
- Sekiro Shadows Die Twice: Tokujiro the Glutton Boss Fight
- Sekiro Shadows Die Twice: Mist Noble Boss Fight
- Sekiro Shadows Die Twice: O'Rin of the Water Boss Fight
- Sekiro Shadows Die Twice: Chained Ogre from Ashina Castle Boss Fight
- Sekiro Shadows Die Twice: Lonely Shadow Vilehand Boss Fight
- Sekiro Shadows Die Twice: Long-arm Centipede Sen'un Boss Fight
- Sekiro Shadows Die Twice: Snake Eyes Shirafuji Boss Fight
- Sekiro Shadows Die Twice: Long-arm Centipede Giraffe Boss Fight
- Sekiro Shadows Die Twice: Shinobi Eyes Shirahagi Boss Fight
- Sekiro Shadows Die Twice: Corrupted Monk Boss Fight
- Sekiro Shadows Die Twice: General Kuranosuke Matsumoto Boss Fight
- Sekiro Shadows Die Twice: Shichimen Warrior Boss Fight
- Sekiro Shadows Die Twice: Ashina Elite - Jinsuke Saze Boss Fight
- Sekiro Shadows Die Twice: Headless (underwater) #1 Boss Fight
- Sekiro Shadows Die Twice: Lone Shadow Masanaga Boss Fight
- Sekiro Shadows Die Twice: Emma, the Gentle Blade Boss Fight
- Sekiro Shadows Die Twice: Isshin Ashina Boss Fight
- Sekiro Shadows Die Twice: Great Shinobi Owl Boss Fight
- Sekiro Shadows Die Twice: True Corrupted Monk Boss Fight
- Sekiro Shadows Die Twice: Sakura Bull of the Palace Boss Fight
- Sekiro Shadows Die Twice: Demon of Hatred Boss Fight
- Sekiro Shadows Die Twice: Ashina Elite - Ujinari Mizuo Boss Fight
- Sekiro Shadows Die Twice: Shigekichi of the Red Guard Boss Fight
- Sekiro Shadows Die Twice: Seven Ashina Spears - Shume Masaji Oniwa Boss Fight
- Sekiro Shadows Die Twice: Genichiro & Isshin, the Sword Saint Boss Fight
- Sekiro Shadows Die Twice: Okami Leader Shizu Boss Fight
- Sekiro Shadows Die Twice: Headless #2 Boss Fight
- Sekiro Shadows Die Twice: Shichimen Warrior #1 Boss Fight
- Sekiro Shadows Die Twice: Shichimen Warrior #2 Boss Fight
- Sekiro Shadows Die Twice: Headless (underwater) #3 Boss Fight
- Sekiro Shadows Die Twice: Headless #4 Boss Fight
- Sekiro Shadows Die Twice: Headless #5 Boss Fight
- Sekiro Shadows Die Twice: Divine Dragon - Main Boss
- Sekiro Shadows Die Twice: Bosses
- Sekiro Shadows Die Twice: Game guide
You are not permitted to copy any image, text or info from this page. This site is not associated with and/or endorsed by the developers and the publishers. All logos and images are copyrighted by their respective owners.
Copyright © 2000 - 2026 Webedia Polska SA for gamepressure.com, unofficial game guides, walkthroughs, secrets, game tips, maps & strategies for top games.