Sekiro Shadows Die Twice: Genichiro Ashina Boss Fight
This page in our guide to Sekiro: Shadows Die Twice focuses on the fight with Genichiro Ashina. This is one of the bosses you have to defeat in order to make progress in the main story. Our description contains information about Genichiro's attacks and ways of weakening him.
![Lokalizacja: Ashina Castle [Castle Tower Lookout] - Genichiro Ashina | Sekiro Shadows Die Twice Boss Fight - Bosses - Sekiro Guide and Walkthrough](/sekiro-shadows-die-twice/gfx/word/456203671.jpg)
Lokalizacja: Ashina Castle [Castle Tower Lookout]
Rewards: Memory: Genichiro Ashina, Ninjutsu Techniques - they have their own slot in the menu where you can set your active skill, Bloodsmoke Ninjutsu.
You encounter Genichiro Ashina after you reach the highest point in Ashina Castle. Exit through the window on one of the bottom floors. When you are on the rooftop, use the grappling hook to reach the watchtower presented in the picture.
- Preparing for the fight with Genichiro Ashina
- The first phase of the fight
- The second phase of the fight
Preparing for the fight with Genichiro Ashina

Preparations are optional, but you shouldn't skip them:
- There are a few Eel Livers in the castle (see the picture above). They reduce thunder reduction and Shock status effect. These consumables will be useful during the second phase of the fight with Genichiro Ashina.
- Resupply Spirit Emblems - you can buy them, e.g. with gold at a Sculptor's Idol.
- Set your favorite Combat Art and/or prosthetic tool for offensive purposes. In our playthrough, we used Shadowrush from Shinobi Arts.
The first phase of the fight
Genichiro Ashina fights with two weapons:
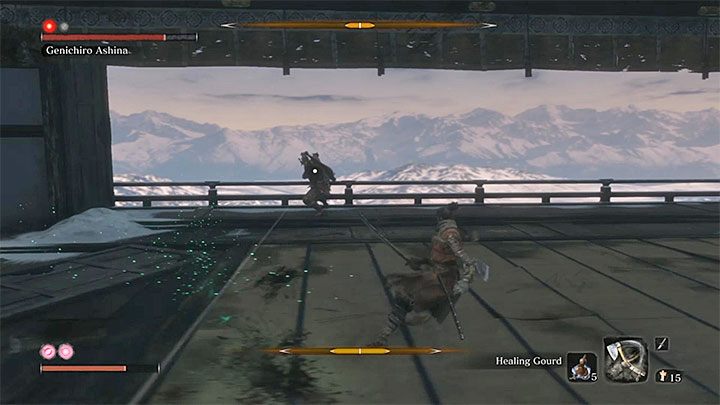
- Bow - The boss can shoot single arrows or a series of them. Usually, Genishiro uses his bow when you are farther away from him. However, he can shoot a few arrows after he receives more damage from a melee weapon. Avoid his arrows by dodging or by deflecting/blocking them with your katana.
- Katana - Genichiro can use single fast attacks and combos.
It is important to dodge Genichiro's unblockable attacks (those marked with a red symbol). Genichiro has access to all types of these attacks - thrust, sweep and grab attack.
The majority of the unblockable attacks happen after Genichiro makes a long jump (see the picture above). If you don't want to risk with identifying them and countering with Mikiri Counter, move back from the boss before he lands on the ground.

You need to be aggressive if you want to defeat Genichiro. Don't try to fight with him from a distance. Instead, you have to keep reducing the distance. Perform a single or a few melee attacks and try to deflect Genichiro's strikes.
Defeat Genichiro by weakening his posture, not by depleting his health bar. You can't make longer breaks between attacks - the boss restores his posture fast. It will take longer to regenerate after Genichiro receives more damage. Deplete Genichiro's two red dots to start the second phase of the fight - you can do that by performing 2 Deathblows.
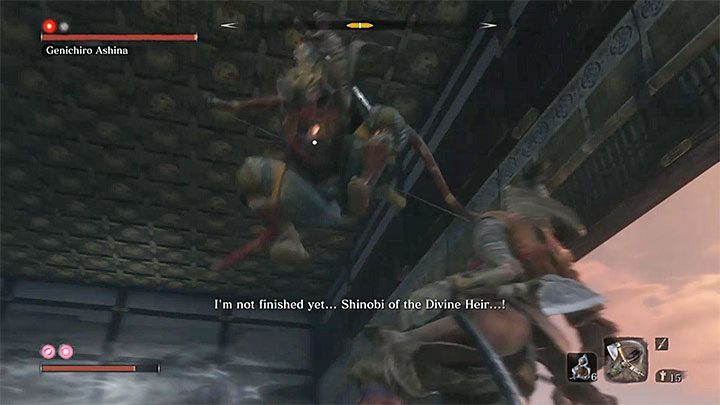
The second phase of the fight

You can eat an Eel Liver at the beginning of the second phase. You need to weaken Genichiro's posture once again. He doesn't have his armor anymore, however, the boss is now able to use a powerful attack during which he shoots lightning. You can act in three ways:
- Use Lightning Reversal - This move is difficult to use. It only works when you are hit by lightning while you are in the air (e.g. when you jump). Press the attack button (R1/RB) before you touch the ground. Otherwise, you will get electrocuted.
- Use perfect dodges - They are easier to do when you are close to Genichiro while he uses his attacks.
- Use your Combat Art before the enemy attacks you, e.g. Shadowrush. Use it right before the boss shoots lightning - you shouldn't get hit during your move.
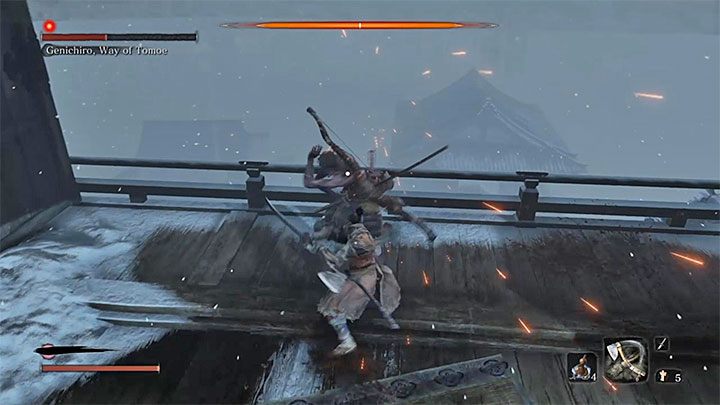
Besides the addition of the lightning attack, you need to fight the boss in the same way you did during the first stage. Keep attacking him with fast melee attacks. Strike him once or a few times and then focus on blocking Genichiro's attacks.
Genichiro in his second stage can use unblockable attacks, too - he relies on thrusts. Dodge them at the right moment or use Mikiri Counter. If you still have a few Spirit Emblems left, now is the best moment to use them all. We attacked the boss a few times with Shadowrsuh. Deplete Genichiro's posture bar to deal him a Deathblow and then perform a Shinobi Execution (this happens automatically).
- Sekiro Guide and Walkthrough
- Sekiro Shadows Die Twice: Game guide
- Sekiro Shadows Die Twice: Bosses
- Sekiro Shadows Die Twice: General Naomori Kawarada Boss Fight
- Sekiro Shadows Die Twice: Chained Ogre Boss Fight
- Sekiro Shadows Die Twice: General Tenzen Yamauchi Boss Fight
- Sekiro Shadows Die Twice: Great Serpent Boss Fight
- Sekiro Shadows Die Twice: Great Serpent - the second and third encounter
- Sekiro Shadows Die Twice: Juzou the Drunkard Boss Fight
- Sekiro Shadows Die Twice: Lady Butterfly Boss Fight
- Sekiro Shadows Die Twice: Unnamed masked purple enemy Boss Fight
- Sekiro Shadows Die Twice: Gyoubu Oniwa Boss Fight
- Sekiro Shadows Die Twice: The Blazing Bull Boss Fight
- Sekiro Shadows Die Twice: Shinobi Hunter Enshin of Misen Boss Fight
- Sekiro Shadows Die Twice: Lone Shadow Longswordsman Boss Fight
- Sekiro Shadows Die Twice: Seven Ashina Spears Boss Fight
- Sekiro Shadows Die Twice: Armored Warrior Boss Fight
- Sekiro Shadows Die Twice: Genichiro Ashina Boss Fight
- Sekiro Shadows Die Twice: Guardian Ape in Sunken Valley Boss Fight
- Sekiro Shadows Die Twice: Headless Guardian Ape in Ashina Depths Boss Fight
- Sekiro Shadows Die Twice: Tokujiro the Glutton Boss Fight
- Sekiro Shadows Die Twice: Mist Noble Boss Fight
- Sekiro Shadows Die Twice: O'Rin of the Water Boss Fight
- Sekiro Shadows Die Twice: Chained Ogre from Ashina Castle Boss Fight
- Sekiro Shadows Die Twice: Lonely Shadow Vilehand Boss Fight
- Sekiro Shadows Die Twice: Long-arm Centipede Sen'un Boss Fight
- Sekiro Shadows Die Twice: Snake Eyes Shirafuji Boss Fight
- Sekiro Shadows Die Twice: Long-arm Centipede Giraffe Boss Fight
- Sekiro Shadows Die Twice: Shinobi Eyes Shirahagi Boss Fight
- Sekiro Shadows Die Twice: Corrupted Monk Boss Fight
- Sekiro Shadows Die Twice: General Kuranosuke Matsumoto Boss Fight
- Sekiro Shadows Die Twice: Shichimen Warrior Boss Fight
- Sekiro Shadows Die Twice: Ashina Elite - Jinsuke Saze Boss Fight
- Sekiro Shadows Die Twice: Headless (underwater) #1 Boss Fight
- Sekiro Shadows Die Twice: Lone Shadow Masanaga Boss Fight
- Sekiro Shadows Die Twice: Emma, the Gentle Blade Boss Fight
- Sekiro Shadows Die Twice: Isshin Ashina Boss Fight
- Sekiro Shadows Die Twice: Great Shinobi Owl Boss Fight
- Sekiro Shadows Die Twice: True Corrupted Monk Boss Fight
- Sekiro Shadows Die Twice: Sakura Bull of the Palace Boss Fight
- Sekiro Shadows Die Twice: Demon of Hatred Boss Fight
- Sekiro Shadows Die Twice: Ashina Elite - Ujinari Mizuo Boss Fight
- Sekiro Shadows Die Twice: Shigekichi of the Red Guard Boss Fight
- Sekiro Shadows Die Twice: Seven Ashina Spears - Shume Masaji Oniwa Boss Fight
- Sekiro Shadows Die Twice: Genichiro & Isshin, the Sword Saint Boss Fight
- Sekiro Shadows Die Twice: Okami Leader Shizu Boss Fight
- Sekiro Shadows Die Twice: Headless #2 Boss Fight
- Sekiro Shadows Die Twice: Shichimen Warrior #1 Boss Fight
- Sekiro Shadows Die Twice: Shichimen Warrior #2 Boss Fight
- Sekiro Shadows Die Twice: Headless (underwater) #3 Boss Fight
- Sekiro Shadows Die Twice: Headless #4 Boss Fight
- Sekiro Shadows Die Twice: Headless #5 Boss Fight
- Sekiro Shadows Die Twice: Divine Dragon - Main Boss
- Sekiro Shadows Die Twice: Bosses
- Sekiro Shadows Die Twice: Game guide
You are not permitted to copy any image, text or info from this page. This site is not associated with and/or endorsed by the developers and the publishers. All logos and images are copyrighted by their respective owners.
Copyright © 2000 - 2026 Webedia Polska SA for gamepressure.com, unofficial game guides, walkthroughs, secrets, game tips, maps & strategies for top games.