GTA 5: The Merryweather Heist, Offshore variant walkthrough
This page of the guide to Grand Theft Auto V has a walkthrough for mission 34 - The Merryweather Heist - the offshore variant. Our GTA 5 guide will help you transport the minisub near the training grounds, show where to find the underwater cargo, and how to get back to the airport.
If you chose the Freighter variant, check out its separate page.
- Mission 34 - The Merryweather Heist - the Offshore variant general information
- Mission 34 - The Merryweather Heist - the Offshore variant full walkthrough
- Rewards and challenges in mission 34 - The Merryweather Heist - the Offshore variant
Mission 34 - The Merryweather Heist - the Offshore variant general information
Way to unlock: You need to complete Main Missions 31 (Minisub) and 33 (Cargobob), and also develop Michael's pilotage skills (Additional mission: Flight School; it may turn out that also completing some other missions, reserved for Franklin and Michael. is necessary). While playing as Michael, wait for a message from Trevor. You can now go to Floyd' apartment (letter H on the world map).
Playable characters: Trevor, Michael, Franklin
Additional information: this heist is even more demanding than the jewel store job and puts even more stress on teamwork between the playable characters. The mission consists of three parts - transporting the submarine into the area of the of the Merryweather vessel, lowering the submarine and using it to locate the cargo, and return to the airport with the stolen cargo.
Mission 34 - The Merryweather Heist - the Offshore variant full walkthrough

After you return to Floyd's apartment, watch the cutscene of the meeting of all the people involved in the heist. While playing as Michael exit the building and obtain any vehicle with the capacity of, at least three. Your first task is to reach the airport seized by Trevor, which is located in the central part of the world map, To the South-West of the Sandy Shores.
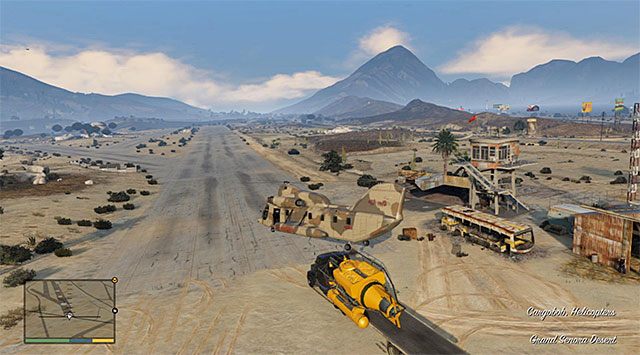
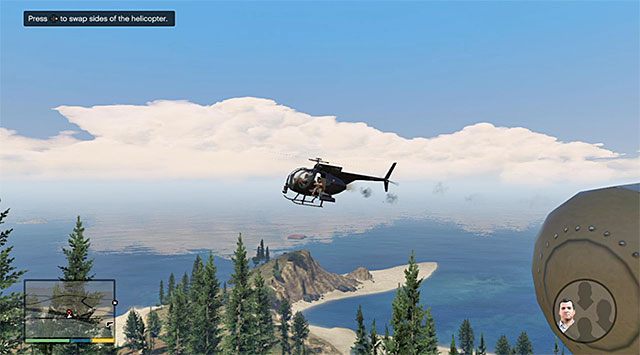
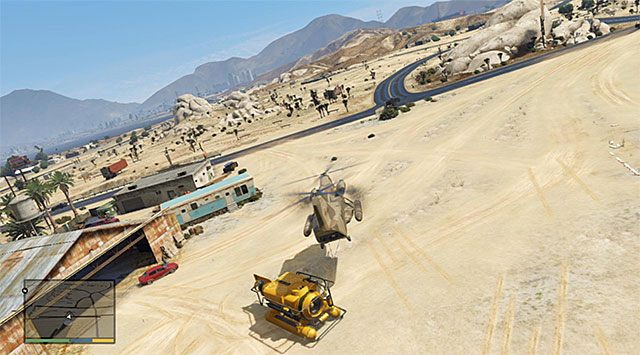
Take your seat aboard the cargo helicopter (Cargobob), fly up into the air and keep the helicopter hovering above the sub. Extend the hoist and catch onto the sub to start the process of transporting it.
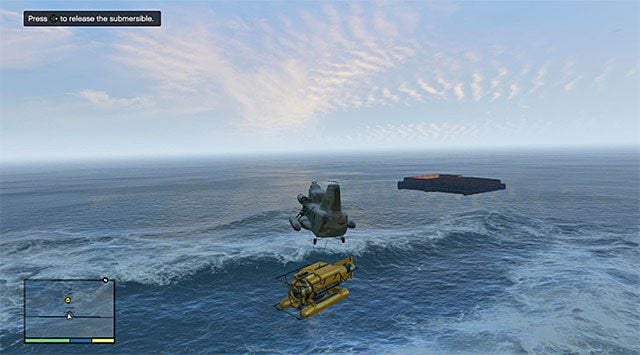
Your destination is to the North-West of the island so, you are up for a long flight. Try and keep the chopper at a high altitude, thanks to which you will avoid knocking against a tree or a slope of the Chiliad mount. After you get into the region where the tests are conducted, decrease the flight speed and release the sub.

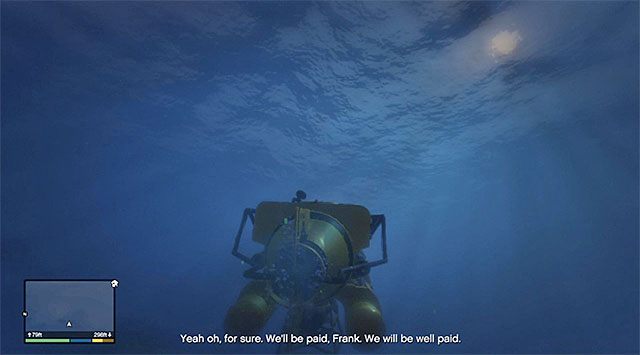
After you cut to Trevor select the phone from his inventory and access the Trackify app. You can now start submersing. Swim towards the sea bottom and follow the red dot that you can see on the smartphone's display. You need to keep in mind the fact that the entire process is going to take you some time, because the cargo that you are looking for is deep underwater -it has been shown in the screenshot.
In accordance with the received piece of information, approach the cargo, thanks to which it will automatically cling to the sub. Now, for a change, you will have to start resurfacing but, the good news is that you will not be bothered (for now) by anybody.
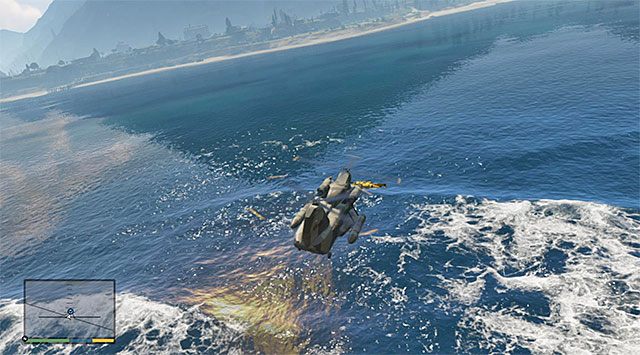
After the sub reemerges again take control over the chopper controlled by Michael. Hover on, the chopper, over the sub and use the hoist in the way that you have already learned, and fly back to the airport where you have started the entire operation.
Unfortunately, you need to come to terms with the fact that things will soon get complicated, because there will be helicopters, with Merryweather mercenaries onboard, to start pursuit after Michael's chopper. Cut to Franklin and start your fire at the enemy choppers, while remembering about the option to slow down time. While conducting fire, you need to change between the left and right machine gunner positions . Fortunately enough, you should be able to tell by the radar where you currently need to fly.
Towards the end of the mission, you will have to conduct fire from the rear part of the helicopter but, in this case this will not change much. Still, try to eliminate all of the threats. The last step is to return to the airport, while playing as Michael again - first detach the sub carefully, and then land. This mission will soon conclude, and the results are not going to be as satisfying as the people participating in the heist would have wanted them to be.
Rewards and challenges in mission 34 - The Merryweather Heist - the Offshore variant
Rewards for completing the mission: none
Requirements for the completion of the mission in 100%:
- Salvager - You need to locate the sunken cargo within 2 minutes
- Time - you need to finish the mission within 14 minutes and 30 seconds. Fly towards the freighter in a straight line and, after you submerge, locate the cargo as quickly as possible and resurface with it just as fast.
- Show no Mercenary - You need to eliminate all of the mercenaries that chase you towards the end of this mission
- Weathering the Storm - you need to complete the chase, in the final part of this mission, within 4 minutes. As long as you will be eliminating the targets efficiently, you will do with a half of this limit.

- GTA 5 Guide
- GTA 5: Quests & Missions
- GTA 5: Main missions
- GTA 5: Prologue walkthrough
- GTA 5: Franklin and Lamar walkthrough
- GTA 5: Repossession walkthrough
- GTA 5: Chop walkthrough
- GTA 5: Complications walkthrough
- GTA 5: Father, Son walkthrough
- GTA 5: The Long Stretch walkthrough
- GTA 5: Marriage Counseling walkthrough
- GTA 5: Daddy's Little Girl walkthrough
- GTA 5: Friend Request walkthrough
- GTA 5: The Good Husband, Additional mission walkthrough
- GTA 5: Casing the Jewel Store walkthrough
- GTA 5: Carbine Rifles walkthrough
- GTA 5: The Jewel Store Job, Loud variant walkthrough
- GTA 5: Bugstars Equipment walkthrough
- GTA 5: BZ Gas Grenades walkthrough
- GTA 5: The Jewel Store Job, Smart variant walkthrough
- GTA 5: Mr. Philips walkthrough
- GTA 5: Nervous Ron walkthrough
- GTA 5: Trevor Philips Industries walkthrough
- GTA 5: Crystal Maze walkthrough
- GTA 5: Friends Reunited walkthrough
- GTA 5: Fame or Shame walkthrough
- GTA 5: Hotel Assassination walkthrough
- GTA 5: The Multi Target Assassination walkthrough
- GTA 5: Dead Man Walking walkthrough
- GTA 5: Did Somebody Say Yoga? walkthrough
- GTA 5: Three's Company walkthrough
- GTA 5: By the Book walkthrough
- GTA 5: Hood Safari walkthrough
- GTA 5: Scouting the Port walkthrough
- GTA 5: Minisub walkthrough
- GTA 5: The Merryweather Heist, Freighter variant walkthrough
- GTA 5: Cargobob walkthrough
- GTA 5: Flight School, Additional activity walkthrough
- GTA 5: The Merryweather Heist, Offshore variant walkthrough
- GTA 5: Blitz Play walkthrough
- GTA 5: Getaway Vehicle walkthrough
- GTA 5: Tow Truck walkthrough
- GTA 5: Trash Truck walkthrough
- GTA 5: Masks walkthrough
- GTA 5: Boiler Suits walkthrough
- GTA 5: Blitz Play 2 walkthrough
- GTA 5: I Fought the Law walkthrough
- GTA 5: Eye in the Sky walkthrough
- GTA 5: The Vice Assassination walkthrough
- GTA 5: The Bus Assassination walkthrough
- GTA 5: Mr. Richards walkthrough
- GTA 5: Caida Libre walkthrough
- GTA 5: Deep Inside walkthrough
- GTA 5: Minor Turbulence walkthrough
- GTA 5: The Construction Assassination walkthrough
- GTA 5: Paleto Score Setup walkthrough
- GTA 5: Military Hardware walkthrough
- GTA 5: Predator walkthrough
- GTA 5: The Paleto Score walkthrough
- GTA 5: Derailed walkthrough
- GTA 5: Monkey Business walkthrough
- GTA 5: Hang Ten walkthrough
- GTA 5: Surveying the Score walkthrough
- GTA 5: Bury the Hatchet walkthrough
- GTA 5: Pack Man walkthrough
- GTA 5: Fresh Meat walkthrough
- GTA 5: The Ballad of Rocco walkthrough
- GTA 5: Cleaning Out the Bureau walkthrough
- GTA 5: Reuniting the Family walkthrough
- GTA 5: Architect's Plans walkthrough
- GTA 5: Getaway Vehicle 2 walkthrough
- GTA 5: Fire Truck walkthrough
- GTA 5: The Bureau Raid, Fire Crew variant walkthrough
- GTA 5: The Bureau Raid, Roof Entry variant walkthrough
- GTA 5: The Wrap Up walkthrough
- GTA 5: Legal Trouble walkthrough
- GTA 5: Lamar Down walkthrough
- GTA 5: Meltdown walkthrough
- GTA 5: Parenting 101, additional mission walkthrough
- GTA 5: The Big Score walkthrough
- GTA 5: Stingers walkthrough
- GTA 5: Gauntlet, Pillbox Hill walkthrough
- GTA 5: Gauntlet, Rockford Hills walkthrough
- GTA 5: Gauntlet, Mission Row walkthrough
- GTA 5: The Big Score 2, the Subtle variant walkthrough
- GTA 5: Getaway Vehicle 3 walkthrough
- GTA 5: Driller walkthrough
- GTA 5: Sidetracked walkthrough
- GTA 5: The Big Score 2, the Obvious variant walkthrough
- GTA 5: Endings
- GTA 5: Main missions
- GTA 5: Quests & Missions
You are not permitted to copy any image, text or info from this page. This site is not associated with and/or endorsed by the developers and the publishers. All logos and images are copyrighted by their respective owners.
Copyright © 2000 - 2026 Webedia Polska SA for gamepressure.com, unofficial game guides, walkthroughs, secrets, game tips, maps & strategies for top games.